
This guide will provide an in depth look into the Supersoldier and the associated Abandoned Facility. Utilising the Supersoldier can provide many benefits but it can be complex to understand at first. This guide should hopefully help you navigate the Abandoned Facility and get the most out of it!
Unlocking the Supersoldier
Before you are able to use your Supersoldier, you will need to make sure you level up your Headquarters to a minimum of Level 3. You will likely be able to achieve this during the tutorial of the game which will introduce you to the Supersoldier and Abandoned Facility.
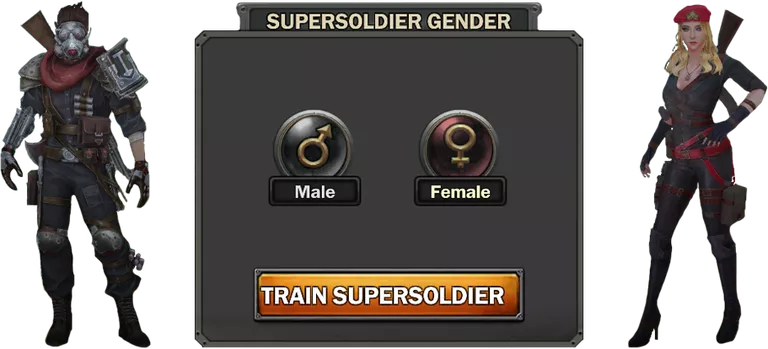
Once you get to Headquarters Level 3, you will be able to tap on your Supersoldier building (above) and create your Supersoldier. You will have an option to select a Male or Female Supersoldier. Once you make your decision, you will not be able to go back on your selection, so be sure you are happy.
You will also now be able to select a name for your Supersoldier instead of the default which is set to “My Supersoldier”… which is boring… right? Be Creative and make up your own name, which can be changed at a later time, if you so wish.
Understanding your new Supersoldier
Now that you have unlocked your Supersoldier, you will need to understand some of the basics. You will need to gain equipment for your Supersoldier to be able to progress further into the Abandoned Facility. To obtain gear you will need to collect fragments from different sectors and combine them to make a design of your choice. Once you have your design it has to be manufactured. To do you will need to buy materials which are available from defeating threats in the Abandoned Facility.
The further through the Abandoned Facility you progress, the better gear fragments that will become available which is essential to your progression. In addition, many items in the Facility Store, are unlocked after completion of different sectors in the Abandoned Facility.
Finally, your Supersoldier will have talent points which you will get from leveling it up. Depending on how they are spent, will depend on various skills available to you, which type of damage and defense you are able to utilise. There will also be more on talents later in the guide.
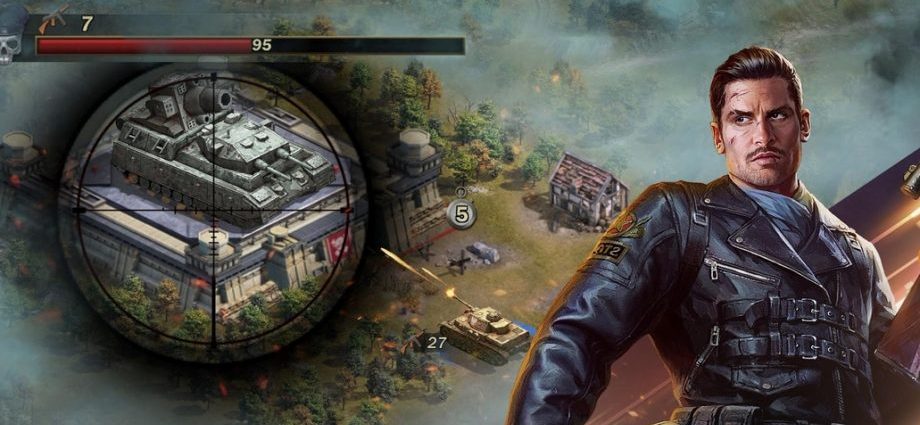
Your first time in the Abandoned Facility
When you first step into the you will be inside what looks like an underground war bunker. As you move through the different sectors of the Abandoned Facility you will encounter several different designs which relate the fights.
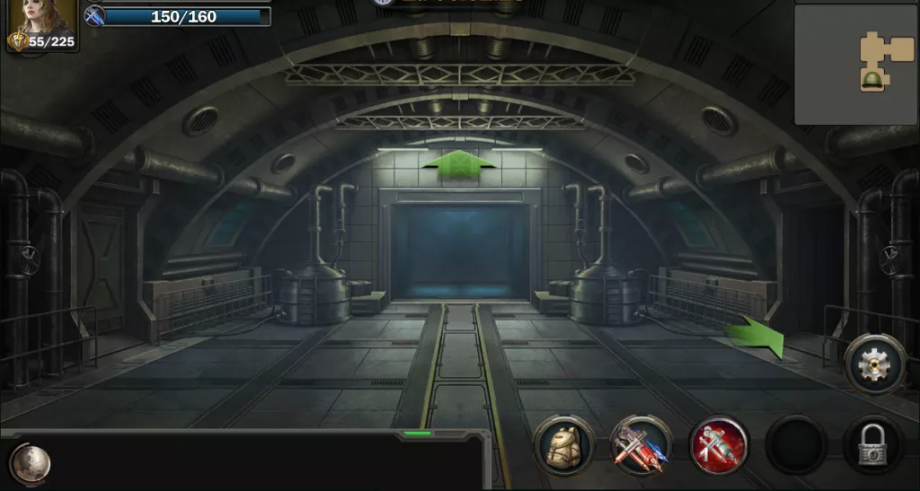
You will notice straight away that there are arrows points in set directions, which indicate where you can move to access the next room on the floor you are exploring. To move to the next room you will need to tap on one of the available green arrows. There may only be a single arrow and other times there may be four. As you move to a room you have not been to before it will be uncovered on the Floor Map which you will see in the top right corner of your screen. Whilst navigating your way through the floors and rooms of the Abandoned Facility, you will encounter threats which you will need to defeat for rewards. The further you progress through the sectors, the more difficult the Threats will become.
In total, each floor has a maximum of 16 rooms. You are able to find the Floor Guardian within a minimum of 6 moves, however, uncovering all rooms in each floor is recommended for maximum rewards. Once you have defeated the floor Guardian you will be asked if you want to carry on or leave.
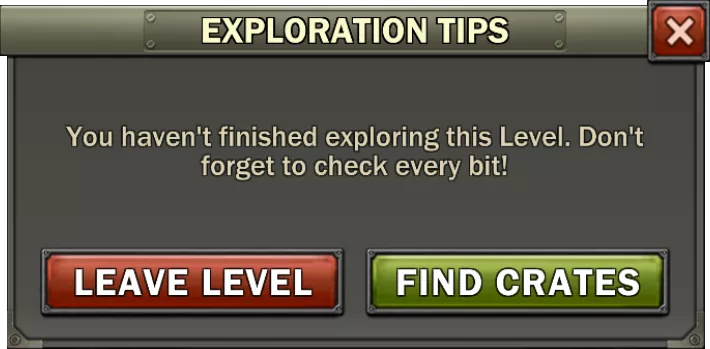
If you leave, you will end with only the rewards you have collected so far or you can continue until the floor has been discovered.
Fights in the Abandoned Facility
There are 2 types of fights in the Abandoned Facility. The first type of fight you will encounter is a standard threat. You will encounter at most, 2 standard Threats prior to encountering the Guardian encounter. The Guardian is the last fight of each Floor which will need to be killed before you are able to claim victory for that fight in the Sector you are combatting. The Guardian is generally the more difficult Threat of the floor and sometimes the Guardian Room will be multiple threats at the same time instead of the standard one threat. As you progress through Sectors, the fights will become progressively more difficult.
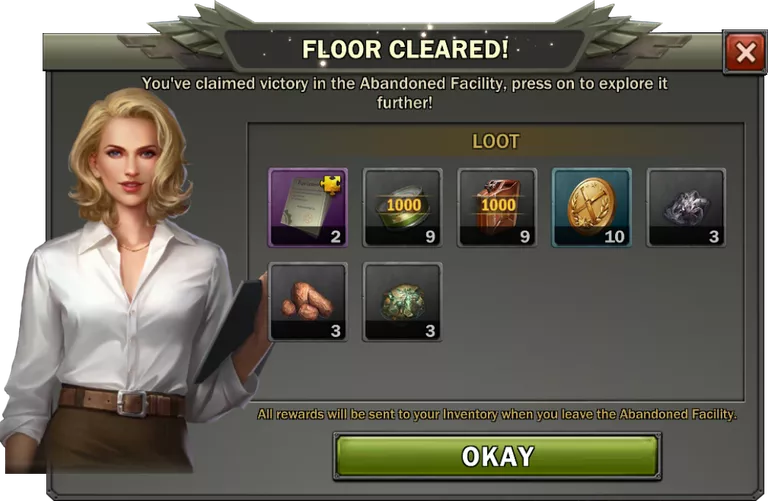
As you complete fights in the Abandoned Facility, whether it is a standard fight or a Guardian, a popup window will show up with the rewards that specific fight has rewarded you.

As mentioned previously, clearing the entire floor is recommended for maximum rewards, and once you have discovered the last room, you will receive a similar popup window like the above informing you that you have cleared the floor, and showing you all of your rewards you obtained in the exploration of that floor.
To be able to get enough of some rewards to help you progress you will need to know which fights in sectors are repeatable or able to be plundered. Once you have sucessfully completed all fights in Sector 1 you will be able to plunder or repeat some fights you have already beaten. Some fights however are not repeatable. To tell the difference you can see the grid below to explain which ones can be repeated and what the icons means.
| FIGHT ICON | EXPLANATION |
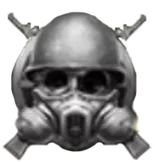 |
These fights are standard, non repeatable fights. Once you complete them, they are no longer available |
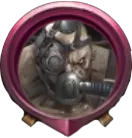 |
These are Mid-Sector Boss Encounters. These can be repeated and plunders a set amount of times per day |
 |
These are the Final Boss of each Sector. Once defeated they can be repeated or plundered a set amount of times per day |
Progressing in the Abandoned Facility
At first, the progression through the early sectors in the Abandoned Facility will depend on your progress through the Epic Missions which start at the games tutorial and progresses through to Epic Mission 8.
| SECTOR | MISSION REQUIRED |
| Sector 1-2 | Completion of Epic Mission 2 |
| Sector 1-3 | Completion of Epic Mission 3 |
| Sector 2-1 | Completion of Epic Mission 4 |
| Sector 2-3 | Completion of Epic Mission 5 |
| Sector 2-5 | Completion of Epic Mission 6 |
| Sector 3-5 | Completion of Epic Mission 7 |
| Sector 3-8 | Completion of Epic Mission 8 |
However, to get to the higher sectors, you will also need to equip and enhance better equipment for Supersoldier. Please see the Equipment section for a more detailed breakdown of how to obtain, manufacture and enhance your gear.
In addition to this, you will also need to utilise Research in your Research Lab. Research which will help your progress in the Abandoned Facility are; Supersoldier Defense, Supersoldier Attack and Supersoldier Health. These 3 researches should be your primary focus for Supersoldier aside from Gear and Talent Points. Do understand however, that Supersoldier Research can end up taking a significant amount of time in comparison to other Research Trees.
Facility Coins
Facility Coins are the currency you will use at the Facility Store. Throughout your exploration through the Abandoned Facility, you will discover chests in some rooms of the floor you are searching. They will reward Facility Coins. The amount of coins from the chests depends on the sector and fight you are on.
The Facility Coins you earn will appear when you enter the Abandoned Facility at the top left corner and if you would like to spend them you can tap on the green ‘Exchange’ button. This will open the Facility Store.

Obtaining Equipment
Progression in the Abandoned Facility will heavily rely on your Supersoldiers Equipment. To be able to unlock the different levels of Equipment Designs will require you to reach different sectors. Once you reach the various sectors, you will be able to repeatedly plunder special fights a set amount of times per day, for rewards. Below will list all the different tiers of Supersoldier Equipment and how to obtain them.
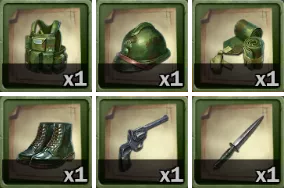
Tier 1 – Green
Basic Gear is the lowest tier of gear you can equip on your Supersoldier. It can be unlocked by levelling up your Destroyer and getting the designs as Levelling up rewards, for Destroyer Levels 13, 14, 17, 18 and 19. If you don’t manage this, you will get the ‘Basic Revolver Design’ from Sector 1, Fight 3. To be able to equip Basic Gear, you will need to have levelled your Supersoldier to at least Level 5.
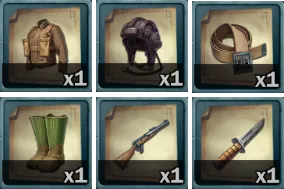
Tier 2 – Blue
This equipment is better than the Basic Green and can be enhanced to make it better! Blue Equipment comes as 3 types. These are; Brutal, Brave and Blazing. Each set of gear compliments a specific talent tree for your Supersoldier. To get this gear you will need to reach and defeat fights in Sectors 3 and 4. You will be rewarded with ‘Lv 15 Sealed Supersoldier Equipment Design Fragments’. To be able to combine the fragments you will need to earn 100 Fragments. This will mean plundering or repeating the special levels is required. Once you get 100 fragments, you will be able to select them from your main Commander Inventory and select the design you would like at the Transformer. You will need to ensure that your Supersoldier has reached Level 15 to be able to equip this tier of Supersoldier Equipment.
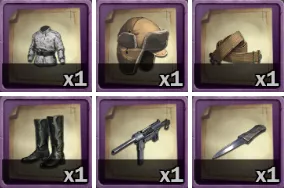
Tier 3 – Purple
We are starting to get towards the gear which will allow you to start progressing further into the Abandoned Facility. Completing fights in Sectors 5 and the first 2 fights in Sector 6 will reward you with ‘Lv 25 Sealed Supersoldier Equipment Design Fragments’. However, to keep getting the fragments you will have to plunder or repeat the special fights in Sector 6. You will also need 100 Fragments to create a full Lv.25 Design. As with Tier 2 equipment, Purple also has 3 types. These are; Crusher, Protector and Heatseeker. To be able to equip this gear your Supersoldier will need to be Level 25. If by this stage your levels are not high enough, you are still able to manufacture the equipment ready for when you can wear it!
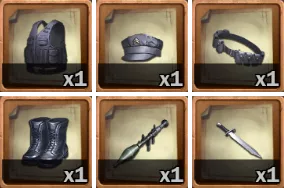
Tier 4 – Orange
This is one of the better Supersoldier equipment tiers. Reaching Sector 6, Fight 3 onwards will reward you with ‘Lv 35 Sealed Supersoldier Equipment Design Fragments’. As with all but the Basic set, Tier 4 also comes with 3 types of designs which relate to the respective talent trees. The equipment types are; Destroyer, Fearless and Bomber. This gear can be enhanced a numerous times. To be able to equip this level of equipment your Supersoldier will need to be Level 35.
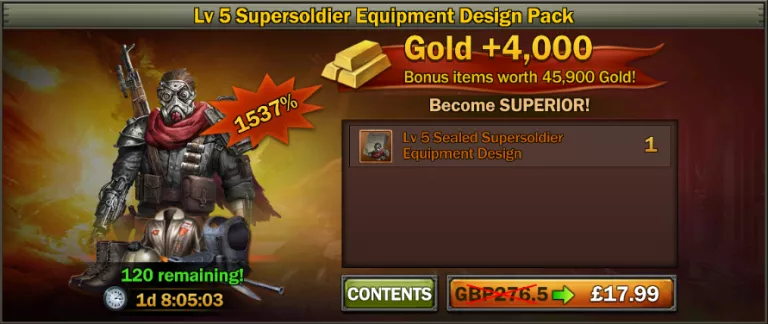
Tier 5 – Orange
If you want to ensure you have the absolute best Supersoldier equipment available in the game, Reaching Sector 7 Fight 5 onwards will reward you with ‘Lv 45 Sealed Supersoldier Equipment Design Fragments’. As with other Tiers, 100 fragments are required to create a single design. If you wish to get this equipment sooner, you can purchase the Level 5 Supersoldier Equipment Design Pack from in-game purchasing. Each bundle will provide you with one design, which you will be able to select yourself. Tier 5 Supersoldier equipment comes with 3 types. These are; Enforcer, Lawbringer and Stealth and like all of the above, (Except Basic) they reflect each of the Supersoldier talent trees.To be able to equip Level 5 Equipment you will need to ensure your Supersoldier is Level 45.
Manufacturing Equipment
Once you have explored the Abandoned Facility and have enough Equipment Fragments to create a design, you will need to tap on your Supersoldier Lab and then the ‘Equipment’ option.
This will bring up a display with several tabs on the right. You will want to ensure you have tapped on the ‘Manufacturable’ option. It is here you will see all of the designs you have created. Select your design you wish to make and you will see information about the design on the left. This will show you the stats of the item, any Power Part Slots available and the resources required to make the design. All of the resources, except the Steel, are available as drops inside the Abandoned Facility. You will need to repeat or plunder special fights continuously until you have the required materials needed to manufacture the equipment piece.
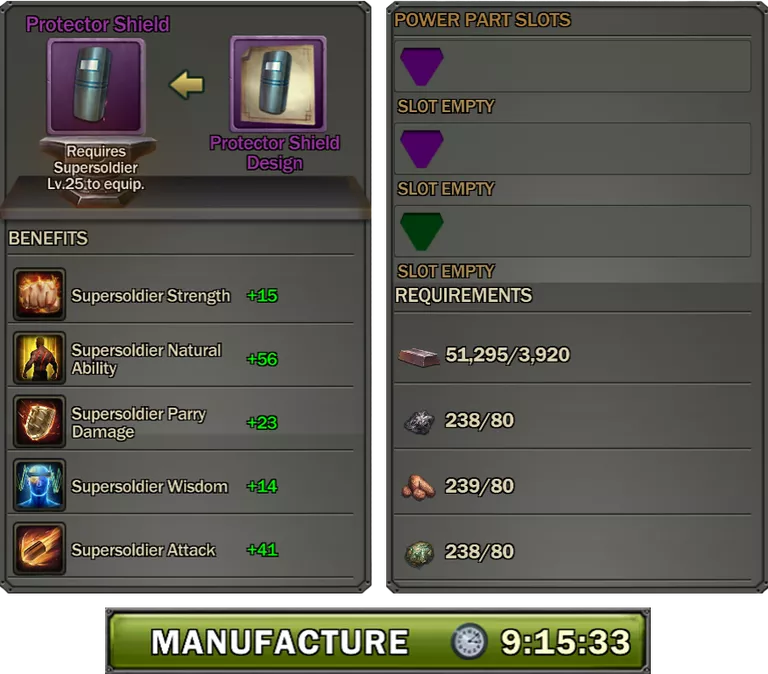
Once you have made sure you have all the required resources, you can tap on ‘Manufacture’. The equipment will not take some time to be made, however, you can use speedups you get in-game to speed up the manufacturing process.
Enhancing Equipment
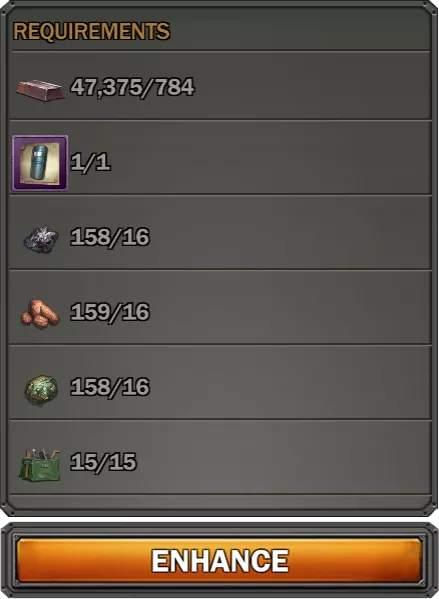
Now you know how to manufacture equipment, you need to understand how to Enhance equipment. The process for enhancing equipment is similar to the initial manufacturing process. The only difference is, you need Toolkits, in addition to the standard resources, Steel and another design. The level of enhancement you wish to do will depend on the Toolkit Level required. Toolkits can be earned as a low drop rate from chests inside the Abandoned Facility.
| TOOLKIT ENHANCEMENT LEVELS | |
| TOOLKIT | ENHANCEMENT LEVELS |
| Toolkit (I) | Enhancement +1 – +5 |
| Toolkit (II) | Enhancement +6 – +10 |
| Toolkit (III) | Enhancement +11 – +15 |
| Toolkit (IV) | Enhancement +16 – +20 |
| Toolkit (V) | Enhancement +21 – +25 |
To start the enhancement process, tap on to your Supersoldier Lab and then Enhance. Here you will see a display showing you all of your currently crafted equipment as well as your equipped gear. Select the piece of equipment you wish to enhance, check the resource requirements and as long as you have the resources, all you need to do is tap ‘Enhance’. Enhancing gear improves your stats and does not require any crafting time. The enhancement is immediate.
Supersoldier Power Parts
Now you have an understanding on Equipment, it is important to understand, as well as enhancing your equipment to make it more powerful, you can also place Power Parts into your gear. Power Parts will add additional targeted stats to your gear which can be enhanced. Power Parts, which are available as a low drop chance, from chests inside the Abandoned Facility from Sector 4 onwards, can be enhanced a maximum of 5 Times. At present there are a total of 6 different Power Parts which can come from chests, however, you will need to check your Supersoldier Equipment Pieces to check which color Power Part can be inserted.
| PART | COLOR | NAME | STAT |
 |
Blue | Energy Power Part | Firepower |
 |
Yellow | Force Power Part | Defense |
 |
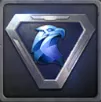
Purple | Thunder Part | Attack |
 |
Green | Light Power Part | Parry |
 |
Red | Anger Power Part | Attack |
 |
White | Moonlight Power Part | Health |
To enhance your Power Parts you will need to either get Refining Parts from the Shooting Gallery under the ‘Destroyer’ rewards or you can use Power Parts you get from chests which you no longer need. Refining Parts come in 5 tiers, each one giving different amount experience points towards the next tier of Power Parts however, using the Shooting Gallery only Tier 2 Refining Parts are available. You may be able to get them from other in-game events as well.
| PART | POINTS |
| Refining Part I | +10 |
| Refining Part II | +30 |
| Refining Part III | +90 |
| Refining Part IV | +270 |
| Refining Part V | +810 |
As well as ensuring your gear is enhanced making sure your Power Parts are kept levelled up will enable you to push forward into the higher sectors of the Abandoned Facility!
Refining Power Part
To enhance your Power Parts you have inserted into your Supersoldier Equipment, you will need to ensure you have some Refining Parts or Power Parts which you no longer need. Once you have, the Parts may be in your Commander Backpack. Open your backpack, find the Parts and ‘Use’ them. This will make them available to your Supersoldier.
Now the Parts are available to your Supersoldier, you can tap on your Supersoldier Lab and then ‘Supersoldier Armory’. This will open up a display with various tabs on the right. You want to select ‘Power Parts’. It is here you will see all of your Power Parts, whether they are embedded or not. To enhance your Power Part, select the one you wish to enhance and you will see the display like the screenshot below showing you how many points you need to upgrade your Power Part and the stats that it will give you.
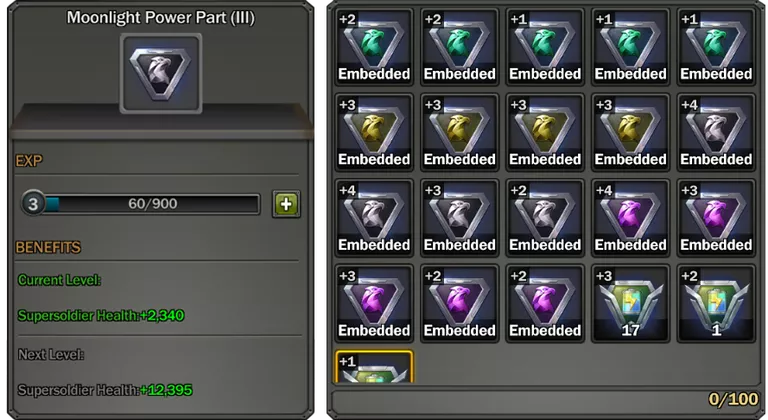
Now you have decided on the Power Part you wish to upgrade, you will need to tap on the small green plus (+) sign. This will allow you to select from all of your Parts you would like to use in the Refining Process. As you select your Parts the points required bar will fill up. Once it reaches its target, you will be able to confirm or cancel the refining process. Below is a screenshot of the selection process.
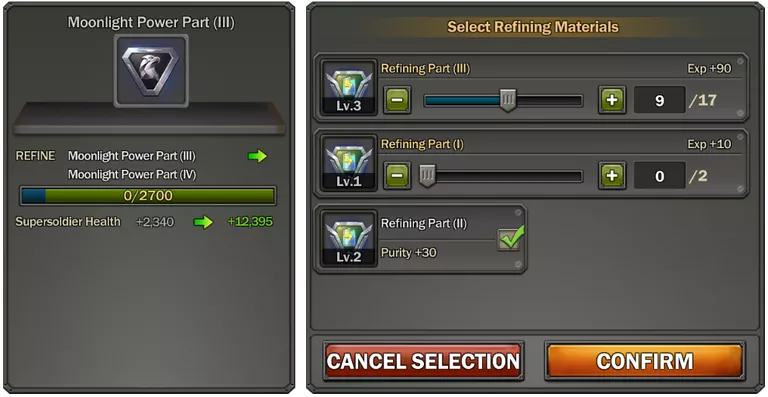
Once you press the large orange ‘Confirm’ option, you will be given a Warning Confirmation message to confirm again you want to use the selected parts to refine your Power Part. Once you accept this Warning Confirmation there is no going back.
Supersoldier Talent Trees
As you level up your Supersoldier you will get Talent Points. Talent Points can be placed into 3 Talent Trees as you see fit. Depending on your choice of Supersoldier Gear, should reflect the Talent tree you decide to place your talent points in. This is because gear reflects talent trees. To be able to access and apply your talent points you will need to tap on your Supersoldier Lab, then tap “Supersoldier” and then you should be able to see “Talent Points” below your Supersoldier Avatar. Tapping on this will open up your Talent Points display.
Brutal is the first talent tree. This is a somewhat balanced build focusing on Offense and some Defense. Whilst it is not the most defensive talent tree, it is a good choice for the earlier stages of the Abandoned Facility.
Trooper is the second talent tree. This is a great defensive talent tree focusing purely on defensive and health related abilities. This talent tree is a high defense but low offense talent tree. Great for progressing in the latter stages of the facility if you are struggling with the other talent trees.
Explosive is the third and final talent tree. This tree is a great offensive tree but will lack on the defensive side as it is a low defense tree. The tree will focus on Explosive and Burst Damage. You may struggle with this talent set up as you progress later into the Abandoned Facility, however it can be a good build at first!
The 3 talent trees and their respective equipment sets are;
| BRUTAL | TROOPER | EXPLOSIVE |
| Brutal | Brave | Blazing |
| Crusher | Protector | Heatseeker |
| Destroyer | Fearless | Bomber |
| Enforcer | Lawbringer | Stealth |
Whilst the above are the recommended talent trees for the gear sets, you can customise your talent tree points however you want. Be mindful however, once you have placed them, if you wish to reset them you will need to use a Supersoldier Talent Points Reset or if you do not have one, you will need to pay 500 Gold.
Supersoldier Stats Breakdown
| STAT | EXPLANATION |
| Attack | Base Physical Attack Value. Opponents defense reduces attack. |
| Firepower | Base Explosive Damage. Ignores Defense. |
| Defense | Base Defense Value. Reduces Physical Damage. |
| Health | Supersoldier Health |
| Strength | Secondary Stat. 1 Strength = 1.5 Supersoldier Attack (Before Research and Talents) |
| Wisdom | Secondary Stat. 1 Wisdom = 0.8 Supersoldier Attack & 1.8 Supersoldier Firepower (Before Research and Talents) |
| Armor | Secondary Stat. 1 Armor = 1 Defense (Before Research and Talents) |
| Physique | Secondary Stat. 1 Physique = 25 Supersoldier Health (Before Research and Talents) |
| Ammo | This is used for Supersoldier Skills inside the Abandoned Facility |
| Health Recovery | When you move to a new floor this is the amount of health recovered |
| Ammo Recovery | After a successful fight, you will regain this amount of Ammo |
| Burning Ability | Increases the Burning Ability of your Supersoldier |
| Burst Ability | Increases the Burst Ability of your Supersoldier |
| Natural Ability | Determines how much health is recovered using the Trooper Health Regeneration Skill |
| Exploration Stamina | Stamina you use to navigate the Abandoned Facility |
| Storage Slots | Amount of slots in your Supersoldier Storage Bag |
| Storage Capacity | Amount of Items you can carry |
| Stamina Jolt | Stamina increase potion for use in the Facility |
| Ammo Pack | Ammo increase potion for use in the Facility |
| Medicine | Health Recovery Potion for use in the Facility |
| Stamina Jolt Effect | Determines how much Stamina your Stamina Jolt recovers |
| Ammo Pack Effect | Determines how much Ammo, your Ammo Pack recovers |
| Medicine Effect | Determines how much Health your Health Potion recovers |
| Initiative | Determines who goes first in battle |
| Parry Damage | Damage the opponent will receive upon attacking. Ignores defense. |